
Introduction
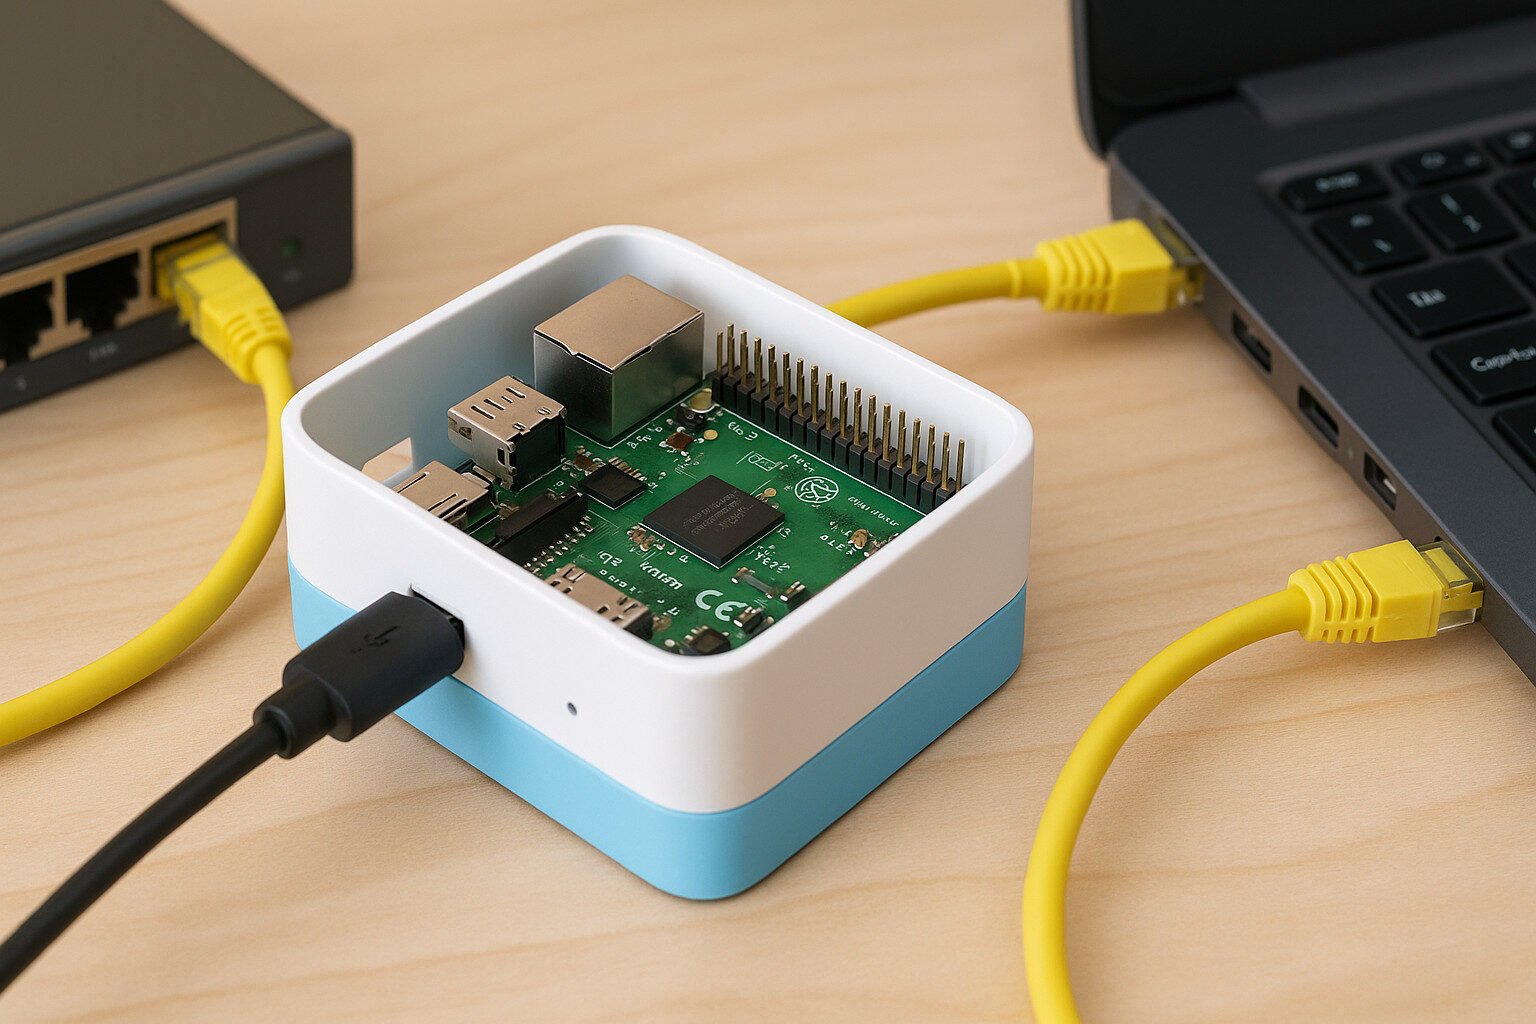
WireGuard Raspberry Pi site-to-site VPN lets you bridge two private networks across the internet using a travel-sized computer you can carry in your bag. This setup uses Raspberry Pi as a dedicated VPN endpoint. If you’ve ever been stuck trying to access your home NAS or print server from a hotel room, this is your ticket.
A travel router running WireGuard can connect your remote devices back to your home or office network with full encryption. It uses public and private keypairs, defines interface tunnels, and sets up IP forwarding so the two networks feel like one. This article covers exactly how to generate keys, write configs, assign allowed IPs, and make the whole thing persist through reboots.
Key Takeaways
- WireGuard is faster and easier than older VPNs
- A Raspberry Pi makes a lightweight, travel-friendly VPN node
- Keypair authentication and firewall rules are essential
- Use scripts to keep the tunnel alive and restore connectivity
- With the right setup, you can route anything through your Pi securely
Understanding the Components
WireGuard Protocol
WireGuard is a modern VPN protocol built with simplicity and speed in mind. Unlike older options like OpenVPN or IPsec, WireGuard uses minimal code and relies on Curve25519 for key exchange and ChaCha20 for encryption. The result is faster setup, fewer bugs, and less overhead.
Keypair Authentication
Each WireGuard peer needs a public and private key. These keys form the foundation of the encrypted tunnel. The public key is shared with other peers, while the private key stays hidden. You can also add a pre-shared key for another encryption layer.
Interface and Tunnels
WireGuard assigns a virtual network interface like wg0. When active, it behaves like a network card inside the Raspberry Pi. It takes care of sending and receiving packets between peers based on the configuration file.
Allowed IPs
This setting defines what traffic should be routed through the VPN tunnel. If a remote peer’s IP is listed under AllowedIPs, traffic for that IP will be sent to the tunnel.
Persistent Keepalive
This setting helps in networks with NAT. It sends a small packet every few seconds to keep the tunnel alive. A value of 25 seconds usually works well when one side is behind a firewall.
Port and NAT
WireGuard typically uses UDP port 51820. You’ll need to forward this port on the main network router to your Raspberry Pi for external connections to work. If your Pi is on the move, port forwarding may not be an option, so one site will need to be the server and the other the client.
Routing Table
Linux uses a routing table to decide where to send packets. WireGuard adds its own routes when it starts. You’ll need to make sure those routes don’t conflict with local subnets and devices.
Selecting the Right Raspberry Pi Model
Performance vs Portability
Choosing the right Raspberry Pi depends on how much performance you need and how compact your setup has to be. The Raspberry Pi 4 (2GB or higher) handles WireGuard without breaking a sweat, even with multiple clients. But it’s bulkier and needs more power. The Pi Zero 2 W is slower but small enough to tape to the back of a hotel TV.
Power Considerations
Site-to-site VPNs need reliability. That means a stable power source. If you’re on the road, look for USB power banks with at least 5V 3A output. The Pi 4 draws more current, especially with an Ethernet adapter or WiFi dongle.
Connectivity Options
The Pi 4 has a built-in Ethernet port and dual-band WiFi, which is perfect for setting up one interface for WAN and another for LAN. The Pi Zero 2 W has only WiFi, which can be tricky. You might need a USB OTG adapter and a USB-to-Ethernet dongle for flexibility.
Heat and Throttling
VPN encryption puts some strain on the CPU. Without passive cooling, the Pi 4 might throttle under load, especially in warm environments. Travel setups benefit from a small heatsink or low-profile fan.
Form Factor and Case
Use a low-profile case if you’re tight on space. Modular kits like the Argon Neo offer good thermal protection in a compact frame. Avoid tall tower-style cases unless you like explaining your weird gear at TSA.

- EXPLORE POSSIBILITIES — Take your Raspberry Pi 4 case to another level with included M.2 SATA Expansion Board. Maximiz…
- ALL DAY, EVERYDAY PERFORMANCE — Most powerful Argon ONE M.2 case for the Raspberry Pi 4 is designed to provide you wit…
- EFFICIENT WORKFLOW — Work efficiently with less clutter and easily access two (2) full sized HDMI display ports and op…

Storage Media
Choose a quality microSD card, ideally UHS-1 or better. Flaky cards cause file corruption, which is a nightmare when your config files vanish mid-trip.
Recommended Models
- Pi 4B: Best all-around, supports full networking and performance
- Pi Zero 2 W: Best for size, light use cases
- Pi 3B+: Balanced, but older
- Pi CM4: Great for custom builds, needs carrier board
Preparing the Operating System
Installing Raspberry Pi OS Lite
Start with Raspberry Pi OS Lite. It’s lightweight and doesn’t come with the GUI, which you don’t need for a VPN box. Flash it to your SD card using tools like Raspberry Pi Imager or balenaEtcher.
Enable SSH Access
Before booting, add an empty file named ssh (no extension) to the boot partition. This enables remote access over SSH, so you don’t need a screen or keyboard.
Assigning a Static IP
A static IP is essential for port forwarding and consistent routing. You can set this in dhcpcd.conf or configure your router to assign the same IP via DHCP reservation.
Updating the System
After first boot, run:
sudo apt update && sudo apt full-upgrade -yThen install WireGuard:
sudo apt install wireguard -yBasic Network Setup
Make sure your Pi can reach the internet. Check with ping 8.8.8.8. If it fails, double-check WiFi credentials or Ethernet link. Configure hostname and timezone for easier management.
Install Essentials
Install tools that help you manage networking:
sudo apt install net-tools iptables-persistent ufwThese let you inspect interfaces, set up firewalls, and make routing rules persistent across reboots.
Backup Configs
Before making heavy changes, back up your config files. Just use:
cp /etc/wireguard/wg0.conf ~/wg0-backup.confWriting the Configuration Files
Structure of wg0.conf
The WireGuard configuration file defines the interface and peer settings. It usually lives at /etc/wireguard/wg0.conf. You’ll need one on each Pi—one acts as the server, the other as the client.
Example: Server Configuration
[Interface]
PrivateKey = <server_private_key>
Address = 10.0.0.1/24
ListenPort = 51820
SaveConfig = true

[Peer]
PublicKey = <client_public_key>
AllowedIPs = 10.0.0.2/32
PersistentKeepalive = 25
Example: Client Configuration
[Interface]
PrivateKey = <client_private_key>
Address = 10.0.0.2/24

[Peer]
PublicKey = <server_public_key>
Endpoint = your.home.ip:51820
AllowedIPs = 0.0.0.0/0
PersistentKeepalive = 25
Explanation of Key Fields
Address: Internal VPN IP, not your LAN IPAllowedIPs: Defines which traffic goes through the tunnelEndpoint: IP and port of the peer (used only in client configs)PersistentKeepalive: Useful when behind NAT or firewalls
DNS Considerations
If you’re pushing all traffic through the tunnel, add a DNS server line:
DNS = 1.1.1.1Security Note
Keep private keys out of version control or shared folders. If you’re scripting deployments, use environment variables or encrypted vaults.
Syntax Checks
Before starting the interface, test the syntax:
wg-quick strip wg0This helps catch typos before they ruin your Saturday night.
Firewall, NAT, and Routing Rules
Enabling IP Forwarding
First, make sure the system allows routing between interfaces. Edit /etc/sysctl.conf and uncomment or add this line:
net.ipv4.ip_forward=1Apply the change with:
sudo sysctl -pSetting Up NAT with iptables
To allow traffic from the VPN to reach the internet or LAN, you need Network Address Translation:
sudo iptables -t nat -A POSTROUTING -o eth0 -j MASQUERADEChange eth0 to match your outbound interface. Make rules persistent:
sudo apt install iptables-persistent
sudo netfilter-persistent save
UFW Firewall Setup
If you’re using UFW, allow the VPN port:
sudo ufw allow 51820/udpEnable routing:
sudo nano /etc/ufw/sysctl.confAdd or ensure:
net/ipv4/ip_forward=1Modify /etc/ufw/before.rules to add a NAT rule, similar to iptables.
Routing Table Checks
Check your routes using:
ip routeMake sure there’s a route for your VPN subnet and it doesn’t overlap with local network ranges.
Avoiding Conflicts
VPNs that use 192.168.x.x can conflict with hotel or café WiFi. Consider using unique ranges like 10.13.13.0/24 or 172.24.1.0/24 to avoid headaches.
Split vs Full Tunnel
Decide if all traffic goes through VPN (full tunnel) or just certain subnets (split tunnel). Adjust AllowedIPs in wg0.conf accordingly:
- Full:
0.0.0.0/0 - Split:
10.0.0.0/24, etc.
Testing the VPN Connection
Starting the Interface
To bring up the WireGuard interface, use:
sudo wg-quick up wg0To bring it down:
sudo wg-quick down wg0You should see no errors. If you do, it’s probably a syntax issue in your config file.
Checking the Tunnel
Check the tunnel status:
sudo wgThis shows public keys, handshake timestamps, data transferred, and keepalive stats. If it says “Handshake: never”, something’s not connected right.
Basic Connectivity Tests
Try pinging the peer:
ping 10.0.0.2If that fails, double-check firewall rules, AllowedIPs, and interface status.
Check Internet Routing
To verify if traffic is going through the VPN, use:
curl ifconfig.meDo this before and after starting WireGuard. If the IP changes, you’re tunneling all traffic.
Common Issues
- Wrong endpoint IP or port
- Private key in peer config (don’t do this)
- Firewall blocking 51820/UDP
- Using same subnet on both ends
- DNS failing inside the tunnel
Logs Are Your Friend
Check logs with:
sudo journalctl -u wg-quick@wg0This shows what happened during startup, including errors and interface events.
MTU Mismatches
If large packets fail or SSH lags, try setting a smaller MTU:
PostUp = ip link set mtu 1280 dev %iOr just test it manually before editing configs.
Making It Persistent
Autostarting WireGuard
To make your VPN survive reboots, enable the wg-quick service for your interface:
sudo systemctl enable wg-quick@wg0This starts the VPN every time the Raspberry Pi boots up. Make sure your config is working before doing this, or you’ll lose SSH access fast.
Systemd Watchdog Script
For extra reliability, create a cron job or systemd timer that checks the interface and restarts it if needed:
[Unit]
Description=Check and Restart WireGuard
After=network-online.target

[Service]
ExecStart=/usr/local/bin/check-wg.sh
Type=oneshot

[Install]
WantedBy=multi-user.target
Simple Keepalive Script
#!/bin/bash
if ! ping -c 1 10.0.0.1 >/dev/null; then
  systemctl restart wg-quick@wg0
fi
Schedule this with cron or a systemd timer every 5 minutes.
Reboot Scripts
In some setups, WiFi might not come up fast enough. Add a boot delay or restart the VPN in rc.local or via a delayed service:
sleep 30 && systemctl restart wg-quick@wg0Logging Uptime
Track uptime and tunnel status by logging handshake events:
sudo wg | grep handshake >> /var/log/wireguard-status.logBackup Configurations
Use rsync or cloud sync to back up config files:
rsync -avz /etc/wireguard pi@backupserver:/vpn-backups/Using Your Pi as a Travel Router
Connecting to Public WiFi
When you’re in a hotel or café, the Pi can connect via WiFi and route traffic over the VPN. Use raspi-config or wpa_supplicant.conf to set up WiFi networks. Make sure your interface like wlan0 connects first before launching the VPN.
Captive Portals
Some places use captive portals that require you to log in. Temporarily disable the VPN and connect your phone or laptop directly to the Pi’s shared network. Open a browser and authenticate. Then bring the VPN back up.
Bridging LAN Clients
Enable IP forwarding and create a DHCP server on the Pi using dnsmasq so your laptop and other devices get IPs when connected to the Pi’s LAN port or hotspot.
Sharing VPN with Other Devices
Set up a NAT rule that routes LAN or WiFi clients over the WireGuard tunnel:
iptables -t nat -A POSTROUTING -o wg0 -j MASQUERADENow your phone, tablet, or laptop uses the tunnel when connected to the Pi.
Portable Hotspot Setup
Install and configure hostapd and dnsmasq for WiFi access point mode. Use a different subnet than your VPN tunnel to avoid IP conflicts.
Battery Power on the Go
Use a USB power bank that delivers at least 3A. Some models include 12V car adapters or even solar charging. Measure power draw if you’re planning to leave it running unattended.
Internet Failover
Configure fallback from Ethernet to WiFi or even LTE dongles. Tools like ifmetric or netplan let you prioritize interfaces.
Network Isolation
Use VLANs or separate subnets to isolate your LAN clients from the travel Pi itself, if security is a concern in shared environments.
Quick Reconnection Tips
Keep a small LCD or use LEDs to indicate VPN status. If all else fails, SSH in and reboot the interface manually.
Monitoring and Logging
Checking Interface Status
Use the built-in wg command to see real-time stats:
sudo wg showLook for the latest handshake time, data usage, and peer info. If you haven’t had a handshake in a while, it’s probably dead.
Log Files
System logs hold the key to nearly every problem. Use:
sudo journalctl -u wg-quick@wg0This shows startup info, errors, and reboots. Great for post-mortem VPN failures.
Automated Logging
Redirect WireGuard output to a log file by using systemd or cron jobs:
echo "$(date) - $(sudo wg show)" >> /var/log/wireguard-status.logThis builds a timestamped history of activity for debugging or bragging rights.
Network Monitoring Tools
Install tools like iftop, vnstat, or nload to track bandwidth usage. These help you spot unusual traffic or runaway clients.
Uptime Monitoring
Set up ping monitors or use something like monit to restart the tunnel if it goes silent. For offsite alerts, try integrating with healthchecks.io or a similar service.
Peer-Specific Stats
WireGuard doesn’t give per-peer logs out of the box, but you can script around wg show to track packet flow and latency per peer.
Resource Usage
Use htop to keep an eye on CPU and memory. WireGuard is lightweight, but if you’re tunneling multiple clients and also running services like Pi-hole, it adds up.
Graphical Dashboards
Run Grafana with Prometheus node exporter to visualize bandwidth and tunnel uptime over time. Overkill for most, but looks great.
Maintenance and Security Tips
Regular Updates
Keep your Raspberry Pi OS and packages current. Run:
sudo apt update && sudo apt upgrade -yThis includes kernel patches, WireGuard updates, and any networking improvements.
Rotate Keys
Change your keypairs periodically. Revoke access by removing old public keys from peer configs. Generate new ones the same way as before.
Limit Peer Access
Use AllowedIPs wisely. Never set 0.0.0.0/0 unless you’re tunneling all traffic. For site-to-site, narrow it to specific subnets.
Firewall Hardening
Enable UFW or use iptables to restrict incoming connections to WireGuard’s UDP port only. Deny all other inbound ports by default.
Use Pre-shared Keys
Add an extra layer of encryption by using a PSK alongside your public/private key pairs. It makes brute-forcing even harder.
Monitor Config Changes
Use inotifywait or set up Git version control for /etc/wireguard/ if you’re paranoid or managing multiple nodes.
Secure the Pi
Change default passwords, disable password SSH logins, and use SSH keys. Lock down open services and keep port exposure minimal.
Offline Backups
Store your configs and keys on a secure USB or offline backup in case your Pi gets corrupted or lost.
Disable IP Forwarding if Not Needed
If you disable the VPN, also stop IP forwarding so the Pi doesn’t route traffic unnecessarily.
Physical Security
If you’re using this Pi in public places, put it in a rugged case, label it discreetly, and don’t leave it plugged into unknown networks unattended.
Common Use Cases
Remote Access to Home Network
Connect to your home LAN from anywhere in the world. Use your Pi as a VPN gateway that allows access to file shares, printers, NAS drives, or media servers.
Office-to-Office Bridging
Link two small office networks securely over the internet. This enables shared resources like printers or internal tools to work as if they were on the same LAN.
Travel VPN Gateway
Bring your VPN gateway with you while traveling. The Pi connects to hotel WiFi, establishes a secure tunnel, and protects all devices connected to it.
IoT Device Access
Monitor or update smart home devices while away without exposing them to the public internet. The Pi acts as the secure bridge to your internal devices.
Failover Internet Access
In unstable locations, one site can fail over to another site’s internet connection via the VPN, especially if you use routing and NAT rules.
Home Automation Control
Access Home Assistant or other smart systems securely from outside your home. No need to expose ports or use third-party clouds.
Encrypted Tethering
Use your mobile hotspot to power the Pi and VPN tunnel. Great for travelers who need secure connections on the go without relying on public WiFi.
Self-Hosted Services
Run local services (like a web server or Nextcloud) at home and access them securely while you’re out. The Pi makes the connection seamless and safe.
LAN Games and File Sharing
Play LAN games or transfer large files between sites without uploading to cloud storage. VPN tunnels offer high throughput with minimal latency.
VPN Failover Backup
Set up your Raspberry Pi to act as a backup WireGuard endpoint. If your main server goes down, the Pi picks up the connection for seamless recovery.
Comparison With Other VPN Setups
WireGuard vs OpenVPN
WireGuard is simpler, faster, and more modern than OpenVPN. While OpenVPN has broader platform support and is battle-tested, it uses more CPU and can be harder to configure.
| Feature | WireGuard | OpenVPN |
|---|---|---|
| Speed | High | Medium |
| Codebase | Small (<5k lines) | Large (>100k) |
| Setup Time | Short | Long |
| NAT Handling | Easier | Requires tuning |
| Encryption | Modern (ChaCha20) | Older (AES) |
WireGuard vs IPsec
IPsec is a powerful protocol, often used in enterprise settings, but it’s more complex and less portable. WireGuard focuses on ease of use and strong cryptography without decades of legacy compatibility to worry about.
When to Use Tailscale or ZeroTier
Tailscale and ZeroTier abstract a lot of the complexity. If you want a zero-config VPN with easy device linking and automatic NAT traversal, those are great. But they rely on third-party infrastructure and may have limitations in commercial use cases.
Managed vs Self-Hosted
Running your own VPN gives you full control, fewer privacy trade-offs, and no vendor lock-in. But it also means more maintenance. Choose managed if convenience matters more than sovereignty.
Compatibility Factors
OpenVPN runs on nearly anything, including routers and legacy hardware. WireGuard support is growing but still newer in some environments, especially older operating systems and firmware.
Security Surface
WireGuard’s minimalist approach reduces attack surface. Fewer features, but also fewer things to go wrong.
Peer Scalability
WireGuard requires static configuration for each peer. If you’re managing a fleet of devices, this can become tedious unless scripted or templated.
Final Thoughts
If you’ve made it this far, you’re probably serious about having a secure, portable VPN setup. WireGuard on a Raspberry Pi travel router is a powerful way to connect networks, secure data, and stay in control wherever you go. It’s fast, stable, and small enough to fit in your pocket.
Sure, it takes a bit of effort to configure everything. But once it’s up, the whole thing just works. No bloated GUIs, no licenses, no dependency on commercial VPN providers. Just clean encrypted tunnels between you and the networks you trust.
FAQ
Can I use a Pi Zero W for WireGuard?
Yes, but it’s slow and only has WiFi. Use it for low-traffic links or as a backup node.
Does WireGuard reconnect automatically after losing connection?
Usually yes, especially with PersistentKeepalive. But a script or watchdog improves reliability.
What port does WireGuard use?
UDP 51820 by default. You can change it, but both ends must match.
Can I tunnel all traffic through the VPN?
Yes, set AllowedIPs = 0.0.0.0/0 in the client config.
Do I need a public IP?
One side should have a public IP or be accessible via Dynamic DNS and port forwarding.
References
- Netgate WireGuard Site-to-Site Guide
- Pi My Life Up WireGuard Setup
- StackExchange: Bridging Remote Network with WireGuard