

Raspberry Pi retro gaming turns a Pi 3 or Pi 4 into a multi-system emulation console that runs games from NES, SNES, Sega Genesis, N64, PlayStation, and dozens of other platforms. Three operating systems handle this: RetroPie for maximum configuration control, Batocera for plug-and-play with OTA updates, and Lakka for a lightweight RetroArch-only setup. All three use RetroArch cores for emulation. ROMs must be legally obtained from cartridges you own or from legal ROM sources. Distributing or downloading copyrighted ROMs without owning the original is illegal regardless of the emulator used. This guide covers choosing the right OS, flashing and setup, controller configuration, and display settings.
Last tested: RetroPie 4.8 and Batocera 39 | May 2026 | Raspberry Pi 4 Model B (4GB) and Raspberry Pi 3B+
Key Takeaways
- Pi 4 (2GB or 4GB) is the recommended hardware for Raspberry Pi retro gaming. It handles NES, SNES, Sega Genesis, N64, and PlayStation 1 at full speed in all three OSes, and handles PlayStation 2 and Dreamcast in Batocera and RetroPie with Pi 4 (4GB). Pi 3B+ handles everything up to PlayStation 1 well. Pi Zero 2W works for 16-bit and earlier systems only. Power the Pi 4 with a 5V/3A supply. A 2.5A supply causes undervoltage throttling during heavy emulation.
- ROMs are only legal to use if you own the original cartridge or disc. Downloading ROMs for games you do not own is copyright infringement regardless of the emulator or the age of the game. RetroPie, Batocera, and Lakka ship without any ROMs. Load your own ROMs via USB drive, Samba network share, or SCP. Some games are legally available as free ROMs from the publisher. These are the exception, not the rule.
- RetroPie requires more hands-on configuration than Batocera or Lakka but offers the most flexibility and the largest community of Pi-specific documentation. Batocera is faster to get running and receives OTA updates through its own UI. Lakka is the most minimal. It is essentially just a RetroArch frontend with no EmulationStation layer, best for users who already know RetroArch.
Choosing Your Raspberry Pi Retro Gaming OS

RetroPie is the most widely documented retro gaming OS for Raspberry Pi. It uses EmulationStation as the frontend (the graphical game browser) and RetroArch for the actual emulation. RetroPie installs on top of Raspberry Pi OS, which means the underlying OS is still available for other uses. Configuration is done through raspi-config, the RetroPie setup script, and RetroArch menus. The extensive Pi-specific community documentation makes RetroPie the easiest OS to troubleshoot. Best for: first-time builds, users who want maximum control, Pi 3B+ and Pi 4.
Batocera is a standalone OS (not built on Pi OS) that prioritises ease of use. It flashes directly to the microSD card, boots straight into its own UI, and handles controller detection automatically on first boot. Updates arrive over-the-air through the Batocera UI. Scraping game metadata and artwork is built into the UI without needing separate scripts. Batocera handles PlayStation 2 emulation (PCSX2) on Pi 5 which RetroPie on Pi 4 struggles with. Best for: users who want a console-like experience with minimal setup, Pi 4 and Pi 5.
Lakka is the official Linux distribution for RetroArch, providing a minimal OS with no EmulationStation layer. The interface is RetroArch’s own XMB-style menu, identical to what PlayStation 3 and 4 users recognise. Lakka uses less RAM and storage than RetroPie or Batocera. Best for: users who already know RetroArch, Pi 2 and Pi 3 builds where every MB of RAM matters, or headless builds.
Setting Up RetroPie on Raspberry Pi
Download the RetroPie image for your Pi model from retropie.org.uk/download. Flash it to a microSD card (minimum 16GB, 32GB+ recommended) using Raspberry Pi Imager. Select “Use custom” in the OS menu and choose the downloaded RetroPie .img.gz file. No additional configuration in Imager’s advanced settings is needed. RetroPie handles first-boot setup through its own wizard.
Insert the card, connect the Pi to a TV or monitor via HDMI, connect a USB or Bluetooth controller, and power on with a 5V/3A supply. RetroPie boots into EmulationStation and runs the controller configuration wizard. Map the buttons as prompted. Hold any button for 2 seconds to skip a button that does not exist on the controller.
Expected result: EmulationStation loads and prompts for controller setup. After mapping, the main screen shows system categories. If the screen shows only a command prompt, RetroPie’s EmulationStation did not start. Check that the correct image was downloaded for the Pi model (Pi 4 image on Pi 4, Pi 3 image on Pi 3).
Loading ROMs via Samba network share. The most reliable ROM transfer method on RetroPie is the built-in Samba share. Connect the Pi to the network, then from a Windows machine access \\retropie\roms or from macOS use Finder and Go > Connect to Server > smb://retropie.local. Copy ROM files into the correct system folder (e.g., snes for Super Nintendo ROMs). Press F4 in EmulationStation to exit to the command line, then restart EmulationStation to pick up the new ROMs:
emulationstationExpected result: The system appears in EmulationStation’s carousel and the ROMs are listed under it. If a system does not appear, confirm the ROM file extension is correct for that system. RetroPie’s emulator for SNES expects .sfc or .smc files, for example. The RetroPie documentation at retropie.org.uk lists the accepted file extensions for every emulator.
Controller Setup, Performance, and Display Settings
USB controllers are detected automatically on all three OSes. Any DirectInput USB gamepad works without drivers. The 8BitDo Pro 2, the Buffalo Classic USB controller, and standard USB SNES-style controllers are popular choices that work out of the box. For PlayStation controllers via USB adapter, use a genuine 8BitDo or Mayflash adapter rather than generic no-brand adapters which sometimes have input lag issues.
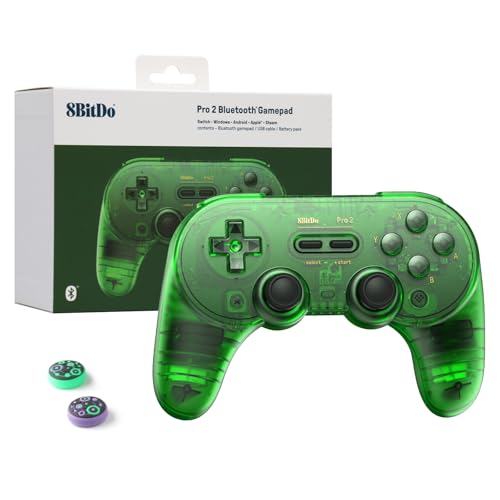
- 【Special Features】This bluetooth gamepad is an upgraded transparent version of 8Bitdo Pro 2,Compatible with Switch, PC, …
- 【2 Pro-level Back Buttons】The gamepad features two Pro-level back buttons.These buttons give you more control so you don…
- 【Dual Mode Support】Wireless Bluetooth or direct USB connectable.You can pair your controller via Bluetooth,or as a wired…
Bluetooth controllers pair through the RetroPie Bluetooth menu (RetroPie menu > Bluetooth) or through Batocera’s controller settings. 8BitDo controllers in “D-input” mode pair correctly with RetroPie. Xbox controllers pair via Bluetooth on Pi 4 running RetroPie 4.8+ without additional drivers.
Display resolution. For a CRT television via composite output, RetroPie supports 240p output which eliminates scanline shimmer on period-correct displays. For an HDMI display, 1080p or 4K works at 60Hz on Pi 4. Set the output resolution in the RetroPie > raspi-config menu or in Batocera’s system settings. RetroArch shaders (CRT-Royale, CRT-Geom) simulate scanline effects on flat panel displays for a more authentic look.
Performance by system on Pi 4: NES, SNES, Game Boy Advance, Sega Genesis, and PlayStation 1 all run at full speed with no configuration changes. Nintendo 64 runs at full speed for most games; a handful of demanding N64 titles (Perfect Dark, Conker’s Bad Fur Day) drop frames. Dreamcast runs at 60-90% speed on most titles. PlayStation 2 requires Pi 5 and is experimental. Nintendo DS runs well with touch input mapped to the right analog stick.
Raspberry Pi Retro Gaming Projects
Bartop arcade cabinet. A bartop cabinet houses a Pi 4, a small monitor (19-24 inch), a pair of arcade joysticks and buttons wired to a USB encoder board, and a powered speaker. The encoder board maps the buttons to standard USB HID gamepad inputs that RetroPie detects without configuration. Bartop plans are freely available from the Arcade Punks community. The Pi 4 handles arcade emulation (MAME, FBNeo) for the vast majority of games from the 1980s and 1990s at full speed.
Handheld build. Pi Zero 2W with a 3.5-inch SPI display, a LiPo battery, and a custom PCB or the Waveshare GameHat produces a functional Game Boy-sized handheld. The Zero 2W handles NES, Game Boy, Game Boy Color, Game Boy Advance, and Sega Master System at full speed. SNES performance is marginal at 16-bit. Several kits exist that package the display, battery, buttons, and audio amplifier onto a single PCB designed for the Zero 2W. For the cheapest wireless Pi suitable for a handheld build, see Cheapest Raspberry Pi with Wireless: Zero W vs Zero 2W Compared.
Pi Cart. A Pi Zero 2W fitted inside a hollowed NES cartridge shell with a short HDMI cable and USB power bank creates a cartridge-form-factor console that plugs directly into a modern TV. The NES cartridge shell provides just enough room for the Zero 2W board, a short USB-C power cable routed to a side notch, and a micro-HDMI adapter. The cartridge sits in a display stand on the TV shelf and appears as a prop until powered on.
4-player arcade with Pi 4. A full 4-player cabinet uses two USB encoder boards (each handling 2 joysticks + buttons), a Pi 4 (4GB), a 32-inch display, and a 2.1 channel powered speaker. MAME handles 4-player arcade games natively; the Pi 4 runs the vast majority of MAME titles from the 1980s and 1990s at full speed. For a safe overclocking config that boosts performance on demanding MAME titles without voiding the Pi’s warranty, see Safe Overclocking Raspberry Pi 5: Tested Configs and Limits.
FAQ
Which Raspberry Pi is best for retro gaming?
Pi 4 (2GB) for most builds. It handles everything up to PlayStation 1 and most N64 games at full speed in RetroPie and Batocera. Pi 4 (4GB) adds headroom for Dreamcast and the more demanding N64 titles. Pi 5 handles PlayStation 2 (experimentally in Batocera) and runs all Pi 4-compatible systems with more performance headroom. Pi 3B+ is a solid budget choice for 16-bit and PlayStation 1 systems. Pi Zero 2W is limited to 16-bit and earlier systems reliably.
Is it legal to use emulators on Raspberry Pi?
The emulator software itself (RetroPie, Batocera, Lakka, RetroArch) is open-source and legal. The legality question is about ROMs. Using ROMs for games you own the original cartridge or disc of is generally accepted. Downloading ROMs for games you do not own, or distributing ROMs, is copyright infringement under the laws of most countries. Neither the age of the game nor the fact that it is “abandonware” changes its copyright status. Some publishers have officially released ROMs for free distribution. Those are legal to download.
RetroPie vs Batocera: which should I use?
RetroPie for a first build on Pi 3 or Pi 4, especially if configuration control and community documentation are priorities. Batocera for a plug-and-play experience on Pi 4 or Pi 5 where OTA updates and automatic metadata scraping matter more than low-level control. Batocera handles PS2 emulation on Pi 5 which RetroPie on Pi 4 does not. Both use the same RetroArch emulation cores underneath and produce identical game compatibility for supported systems.
Can Raspberry Pi emulate Nintendo 64?
Yes. Pi 4 running RetroPie or Batocera with the Mupen64Plus-Next RetroArch core emulates the vast majority of N64 games at full speed. Games with heavy graphics loads (Perfect Dark at high resolutions, Conker’s Bad Fur Day) may drop frames on Pi 4. Pi 5 handles the full N64 library at full speed. Performance varies significantly by game and by the RetroArch core used. The Mupen64Plus-Next core with ParaLLEl RDP renderer gives the best compatibility on Pi 4.
What controller should I use for Raspberry Pi retro gaming?
Any USB DirectInput gamepad works without drivers on RetroPie, Batocera, and Lakka. The 8BitDo Pro 2 is a popular choice. It connects via USB or Bluetooth, has a proper D-pad, and maps correctly without configuration on all three OSes. SNES-style USB controllers (iNNEXT, Kiwitata) are inexpensive and ideal for 8-bit and 16-bit games. For arcade builds, a USB encoder board wired to arcade joysticks and buttons is the standard approach and costs $8-15 for the encoder board itself.
References:
- RetroPie project: retropie.org.uk
- Batocera Linux: batocera.org
- Lakka: lakka.tv
- RetroArch: retroarch.com
- Arcade Punks community: arcadepunks.com
About the Author
Chuck Wilson has been programming and building with computers since the Tandy 1000 era. His professional background includes CAD drafting, manufacturing line programming, and custom computer design. He runs PidiyLab in retirement, documenting Raspberry Pi and homelab projects that he actually deploys and maintains on real hardware. Every article on this site reflects hands-on testing on specific hardware and OS versions, not theoretical walkthroughs.
Last tested hardware: Raspberry Pi 4 Model B (4GB) and Raspberry Pi 3B+. RetroPie 4.8, Batocera 39, May 2026.