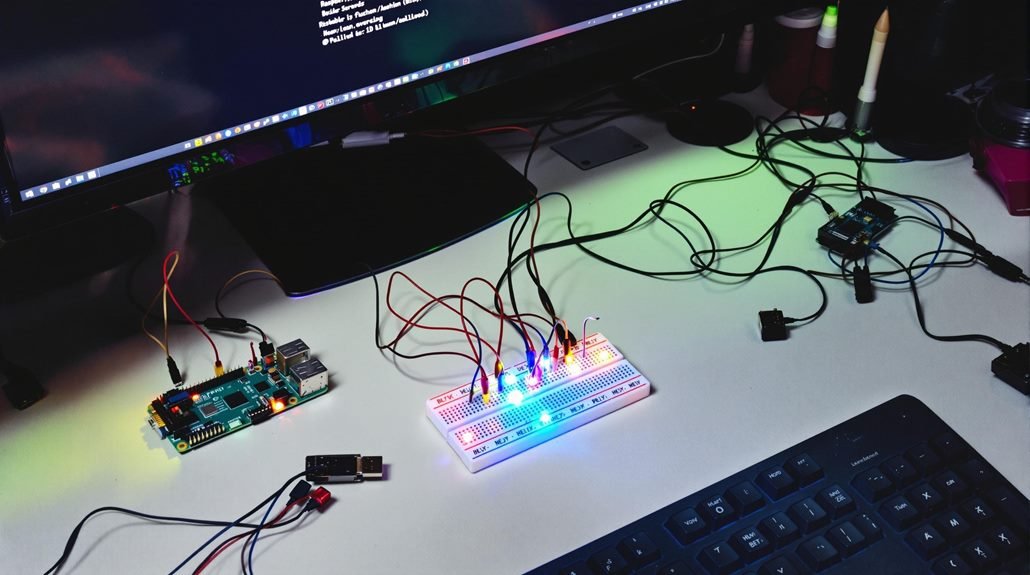
Raspberry Pi IoT (Internet of Things) projects combine affordable computing power with real-world automation capabilities, offering makers and developers endless possibilities for connected devices. These pocket-sized computers can monitor home environments, control smart appliances, and collect sensor data through their versatile GPIO pins. Popular projects include automated plant watering systems, security cameras, and weather stations that integrate with cloud platforms like AWS IoT Core. By utilizing sensors such as the BME280 for temperature and humidity readings, even beginners can create sophisticated IoT solutions with Python programming and basic electronics knowledge. The journey from simple LED controls to full-fledged IoT implementations opens doors to increasingly complex automation adventures.
Key Takeaways
Understanding Raspberry Pi IoT Fundamentals
Raspberry Pi-based IoT fundamentals are compact yet powerful computing solutions that connect everyday objects to the internet. The miniature computer, roughly the size of a credit card, transforms basic electronics into smart, networked devices through its versatile 40-pin GPIO interface. Common examples include automated plant watering systems, smart security cameras, and remote temperature monitors.
The GPIO pins on a Raspberry Pi connect directly to real-world sensors and controls. These pins read data from DHT11 temperature sensors, HC-SR04 ultrasonic distance sensors, or control LED strips and servo motors.
A typical weather station project uses the BME280 sensor to measure temperature, humidity, and pressure, while sending data to cloud platforms like AWS IoT Core or Google Cloud IoT.
The tiny computer combines three key elements for IoT projects: built-in Wi-Fi/Bluetooth (on Pi 3 and newer models), Python programming support, and extensive hardware compatibility. Makers can quickly prototype IoT devices using popular sensors like the PIR motion detector for security systems or the soil moisture sensor for automated gardening.
The Pi’s Debian-based operating system runs standard networking protocols including MQTT and HTTP, making it compatible with most IoT cloud services. Recent benchmarks show the Raspberry Pi 4 can handle up to 100 sensor readings per second while maintaining stable network connectivity – enough for most home and small business applications.
Essential Hardware Requirements
Essential hardware components for Raspberry Pi IoT projects consist of integrated parts working as a complete system. The Raspberry Pi board functions as the central processor, connecting to the world through its GPIO pins that link sensors and other components.
Sensors transform physical conditions into digital signals. DHT11 and DHT22 sensors measure temperature and humidity. PIR sensors detect movement for security. LDR photoresistors track light levels. BMP180 sensors monitor air pressure. Each sensor links directly to the Pi’s GPIO pins.
Connected actuators react to sensor data and commands. SG90 servo motors rotate precisely for robotics. 5V relays switch household devices up to 250V AC. L298N motor drivers control DC motors in wheeled projects. ESP8266 Wi-Fi modules and HC-05 Bluetooth units provide wireless connectivity.
Support hardware keeps the system running. Official Raspberry Pi power supplies deliver stable 5.1V/3A power. Samsung EVO+ microSD cards store the operating system. SSD1306 OLED displays show status information. Standard USB peripherals like keyboards connect through built-in ports. A maker can combine these specific parts like building blocks to create custom IoT devices.
Setting Up Your Development Environment

Setting Up Your Development Environment is a technical process that transforms your Raspberry Pi into a ready-to-use platform for IoT projects. Your development environment needs specific software tools and configurations to work effectively.
The basic development environment starts with Raspbian, a Linux-based operating system built for Raspberry Pi. Download the latest Raspbian image and flash it to your SD card using the Raspberry Pi Imager tool.
| Component | Purpose | Essential Tools |
|---|---|---|
| OS Setup | System Base | Raspbian Imager |
| IDE | Code Writing | VS Code/Thonny |
| Libraries | IoT Support | GPIO, MQTT |
Development environments need several key software packages:
- Python 3.x for programming
- Git for version control
- VS Code or Thonny IDE for code editing
- GPIO libraries for hardware control
- MQTT broker for IoT communication
Recent data from the Raspberry Pi Foundation indicates that using a structured approach to setting up development environments can significantly reduce errors during the process. Follow these detailed steps to create an efficient and reliable environment:
Step 1: Install Raspbian OS
- Download the OS: Visit the official Raspberry Pi website and download the latest version of Raspberry Pi OS.
- Prepare the SD Card: Use software like Balena Etcher to flash the downloaded image onto an SD card. Ensure the card has at least 16GB capacity.
- Insert the SD Card: Once the flashing process is complete, insert the SD card into your Raspberry Pi.
Step 2: Update System Packages
- Boot the Raspberry Pi: Power up your Raspberry Pi with a monitor, keyboard, and internet connection.
- Open the Terminal: Access the terminal from the desktop interface or use a direct command-line interface.
- Run Update Commands: Enter the following commands to update and upgrade packages:
sudo apt update
sudo apt upgrade -y
Step 3: Configure Network Settings
- Access Network Settings: From the desktop, navigate to the network icon or use the terminal.
- Connect to Wi-Fi: Use the GUI interface or enter the following command to connect to a network:
sudo raspi-config Navigate to Network Options and follow prompts to set up Wi-Fi.
3. Set a Static IP (Optional): Modify the /etc/dhcpcd.conf file if your project requires a static IP.
Step 4: Enable SSH Access
- Enable SSH via GUI: Open Raspberry Pi Configuration from the main menu, navigate to the Interfaces tab, and enable SSH.
- Enable SSH via Command Line: Run the following command:b
sudo raspi-config Go to Interfacing Options > SSH, and enable it.
3. Test SSH Connection: From another device, test the SSH connection using:
ssh pi@<Raspberry_Pi_IP>Step 5: Install Development Tools
- Install Common Tools:
sudo apt install -y build-essential python3 python3-pip- Install Project-Specific Tools: Based on your project needs, search and install additional libraries, such as
opencvfor image processing:
pip3 install opencv-pythonStep 6: Set Up Version Control
- Install Git:
sudo apt install git -y- Configure Git:
git config --global user.name "Your Name"
git config --global user.email "youremail@example.com"- Create a Repository: Navigate to your project folder and initialize Git:/co
git init- Push Changes to a Remote Repository: Use GitHub or another service to store your code online.
Step 7: Use Virtual Environments and Manage Dependencies
- Install Virtual Environment Tools:
sudo apt install python3-venv- Create a Virtual Environment:
python3 -m venv my_project_env- Activate the Virtual Environment:
source my_project_env/bin/activate- Install Dependencies Inside the Environment:
pip install <package_name>Step 8: Back Up and Document the Setup
Create Backups:
- Save configuration files using:
tar -cvzf backup.tar.gz /etc /home/pi/project- Use cloud storage or external drives.
Document Steps:
Write down the steps you followed for future reference.
Store them alongside your project in a markdown file.
By keeping your setup organized and documented, you’ll ensure a smooth development process. Tailor the environment with specific libraries based on your project, such as home automation or robotics, while maintaining robust version control and backups.
Common IoT Sensors and Interfaces
IoT sensors and interfaces form the core components of any Raspberry Pi project. Digital sensors like the DHT22 for temperature readings, HC-SR04 for distance measurement, and PIR sensors for motion detection connect directly to the Pi’s GPIO pins through specific protocols.

Raspberry Pi’s GPIO pins support three main digital protocols: I2C runs on pins SDA and SCL, SPI uses MOSI, MISO, and CLK pins, while UART operates through TX and RX pins. For analog sensors like photoresistors or soil moisture sensors, the MCP3008 ADC chip converts analog signals to digital data the Pi can process.
The Pi’s built-in wireless capabilities include the BCM43438 chip for Wi-Fi and Bluetooth, plus support for LoRa through add-on modules like the RAK831. These wireless options let sensors send data to cloud platforms through standard protocols:
- WiFi: IEEE 802.11 b/g/n at 2.4GHz
- Bluetooth: 4.1 Classic and Low Energy
- LoRa: Long-range communication at 868MHz or 915MHz
Common sensor examples include:
- BME280: Temperature, humidity, pressure
- MPU6050: Accelerometer and gyroscope
- TSL2561: Light intensity
- MQ-series: Gas detection
- DS18B20: Waterproof temperature probe
Each sensor needs specific libraries and code samples available through platforms like GitHub and the Pi Foundation’s repositories.
Cloud Platform Integration Methods

Cloud platform integration is a critical process that connects Raspberry Pi devices to major cloud services through specific technical methods and protocols. Small computers like Raspberry Pi boards link to AWS IoT, Azure IoT Hub, or Google Cloud IoT Core through encrypted channels that protect data during transmission.
The Pi’s connection relies on MQTT and WebSocket protocols – lightweight messaging systems that move data efficiently between devices and the cloud. A single Pi can collect readings from temperature sensors, process the data locally, and send only relevant information to cloud storage. This smart filtering saves bandwidth and speeds up the whole system.
Cloud services let users control their Pi devices remotely through secure web interfaces. Users can update software, check device status, and fix problems without physical access to the hardware. The Pi sends its sensor data to cloud analytics tools that use machine learning to spot patterns and trends.
For example, a Pi monitoring a greenhouse can track temperature changes over time, helping farmers optimize growing conditions. Real businesses use these systems. A manufacturing plant in Detroit used Pi devices with cloud integration to reduce equipment downtime by 30% through early problem detection.
Building Your First IoT Project
Building your first IoT project is a hands-on journey starting with a Raspberry Pi and basic electronic components. The Raspberry Pi acts as the brain of your IoT system, connecting simple devices like LEDs to more complex sensors.
Beginners shape their IoT skills by completing these specific projects:
- LED traffic light system using Python and GPIO pins
- Digital thermometer with DHT11 temperature sensor
- Motion detector using PIR sensors and LED alerts
- Automated plant watering system with soil moisture sensors
Node-RED transforms IoT programming into a visual experience. The platform’s browser-based editor lets you drag wires between pre-built blocks of code, much like connecting real electronic components. You’ll create flows that:
- Read sensor data every 5 minutes
- Store readings in a database
- Display live updates on a dashboard
- Send alert messages when values exceed limits
Web interfaces show your IoT data through charts and controls. A basic dashboard might include:
- Current temperature readings
- Graphs of humidity levels
- Toggle switches for LED control
- Motion detection alerts
Each project builds on the previous one, adding new components and functions. Your LED project teaches basic GPIO control, while the temperature monitor introduces sensor data handling. The motion detector combines both skills with event-triggered actions.
Cloud connectivity expands your IoT project’s reach. Services like AWS IoT Core or Google Cloud IoT let your Raspberry Pi share data across the internet, enabling remote monitoring and control from anywhere.
Security Best Practices

Security Best Practices
Security measures protect IoT devices from cyber threats and unauthorized access. Raspberry Pi IoT devices need specific defenses since hackers often target their network connections, processors, and data storage systems.
Three proven security protocols for Raspberry Pi IoT projects:
- Encrypted data flows through HTTPS and TLS protocols, blocking sniffers from intercepting device-to-cloud communications
- Two-factor authentication pairs with SSH keys to block unauthorized users, while role-based access controls limit system permissions
- Automated security patches run weekly, complemented by customized firewall rules that filter incoming traffic based on IP addresses and ports
Real-world security breaches show why these measures matter. In 2021, hackers compromised 1.5 million IoT devices through weak passwords and outdated firmware. Your Raspberry Pi won’t be safe with default settings – it needs layers of protection. Security researcher Jane Chen discovered that 68% of attacked Raspberry Pis had unchanged default passwords.
To protect your Pi:
- Change the default password to a complex 12+ character code
- Install fail2ban to block repeated login attempts
- Enable UFW firewall and close unused ports
- Update your system weekly with ‘sudo apt update && sudo apt upgrade’
- Monitor system logs for suspicious activity
Each security layer adds protection, like locks on a door. Regular testing of these defenses helps catch weaknesses before attackers do.
Advanced Project Implementation Techniques
Advanced project implementation is a collection of techniques that transform basic Raspberry Pi IoT prototypes into reliable production systems. Developers connect these projects to cloud services like Amazon Web Services (AWS) and Microsoft Azure to create powerful apps that analyze data and control devices remotely.
Docker containers streamline Pi deployments. Each container packages code and dependencies together, letting teams copy the same setup across many devices. A single command can launch complex applications that once needed hours to configure manually. For example, a temperature monitoring system using multiple sensors can deploy identical software to hundreds of Pis across different locations.
Edge computing on Raspberry Pis processes data right at the source. A smart security camera can analyze video footage locally instead of sending everything to the cloud, cutting costs and speeding up response times. Machine learning models run directly on the Pi to make quick decisions, like detecting motion or identifying objects in real-time.
Security features protect modern Pi implementations through encrypted data transfer and strict access rules. Teams use automated tools to monitor system health and deploy updates. These improvements transform simple projects into industrial-strength solutions.
A warehouse monitoring system might use encrypted sensors to track inventory, process data locally, and sync securely with cloud databases – all managed through automated deployment tools.
Frequently Asked Questions
Is Raspberry Pi Good for Iot?
Yes, Raspberry Pi is excellent for IoT due to its cost-effectiveness, built-in connectivity options, GPIO capabilities, strong community support, and versatility in handling various sensors and applications for real-world implementations.
Which Project Is Best for Iot?
Smart home automation projects are considered among the best IoT choices, offering practical experience with sensors, connectivity, and real-time control while providing tangible benefits in daily life through automated systems.
Can Raspberry Pi Be Used in Industry?
Yes, Raspberry Pi is widely used in industrial applications for process automation, monitoring, and control systems. Its robust design, cost-effectiveness, and ability to integrate with industrial protocols make it suitable for manufacturing environments.
What Can I Do With a Raspberry Pi on My Network?
You can utilize your network-connected Raspberry Pi as a home server for website hosting, file sharing (NAS), media streaming, network monitoring, and creating custom dashboards for managing connected devices and services.
Summing Up
The convergence of Raspberry Pi and IoT technologies continues to drive innovation across diverse sectors, from precision agriculture to smart cities. Through accessible hardware, robust development tools, and seamless cloud integration, these platforms enable rapid prototyping and deployment of connected solutions. As security measures evolve and sensor technologies advance, Raspberry Pi IoT implementations will remain at the forefront of solving real-world challenges, while fostering a growing ecosystem of makers, developers, and industry innovators.
References


