
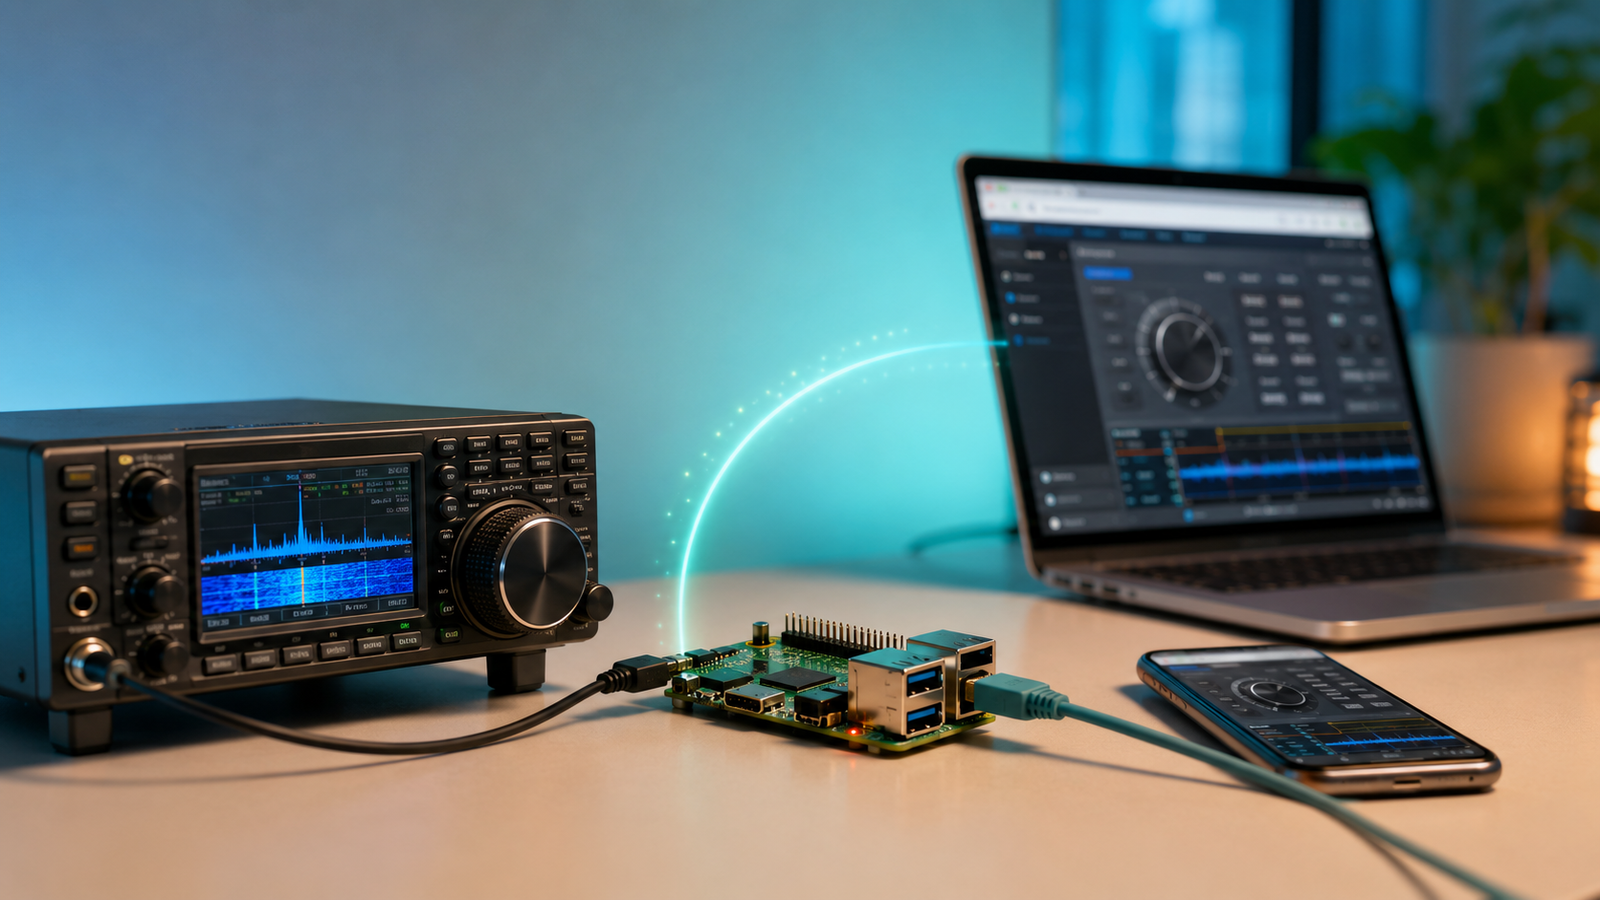
SimpleHRR (Simple Ham Radio Remote) is a free, prebuilt Raspberry Pi image that lets you control a compatible Icom CI-V or Yaesu CAT HF radio from a web browser, with nothing to install on the client side. This guide is a complete, hands-on walkthrough for one radio, the Icom IC-7300 on a Raspberry Pi 4, and then gives the interface requirements and documented settings for the other Icom and Yaesu models SimpleHRR covers. For the IC-7300 the short version is: flash the image, set the radio’s CI-V and USB settings, power the radio on before the Pi, and open https://your-pi-ip:50000/remote in Chrome or Firefox. The rest of this article fills in each step, plus a compatibility table, a verification checklist, and secure remote access.
Last tested: SimpleHRR v0.2.1-T-a (Trixie-based Raspberry Pi OS Lite image) | July 2026 | Raspberry Pi 4 Model B (4GB) | Icom IC-7300 over USB CAT | wired Ethernet
Key Takeaways
- SimpleHRR is a prebuilt image, not a package you install. You flash the SD card, boot the Pi, and reach the web app at
https://your-pi-ip:50000/remote. Note the three easy-to-miss parts of that address: it ishttps, on port50000, ending in/remote. There is no separate client app for your phone or computer. - The radio must be configured for CAT or CI-V control, and it must be powered on before the Pi on every boot (details in the setup steps below). A radio time-out timer of about three minutes is strongly recommended so a stuck transmission cannot key the rig indefinitely.
- Out of the box this is a local-network tool. To operate from outside the house, use Tailscale or a VPN rather than forwarding a port, and never use VOX remotely, because there is no transmit feedback over the link. Remote operation carries license responsibilities; see the safety section.
What SimpleHRR Does
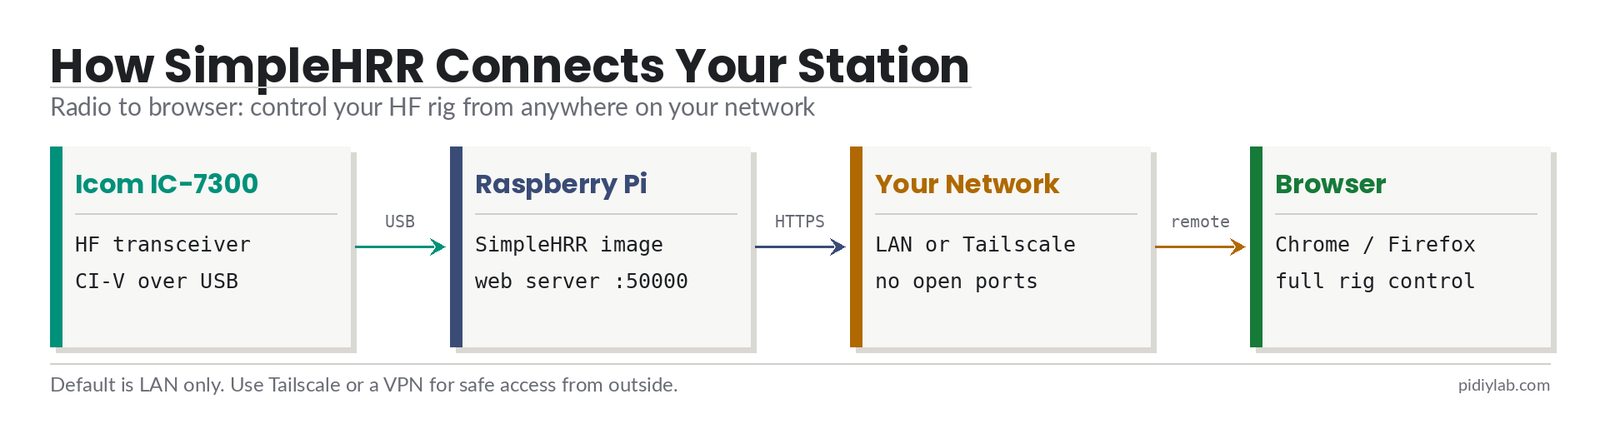
SimpleHRR runs a small web server on the Raspberry Pi that connects to your radio over its CAT/CI-V control interface and streams audio and controls to a browser. You flash one image, the app and its dependencies are already on it, and you operate frequency, band, mode, PTT, and audio from any current Chrome or Firefox browser on your network. According to the project, it provides documented settings for several specific Icom and Yaesu models and, because it uses generic CI-V and CAT commands, may also work with other radios that speak those protocols. It is free to download and use with no subscription; you supply the Pi, the card, and any interface hardware.
Before You Begin: Compatibility and Requirements
Three tiers of support are worth separating: radios the SimpleHRR project reports testing, radios it documents settings for, and other CI-V or CAT radios that may work but are not documented. The table below is drawn from the SimpleHRR installation guide and its release notes. Device nodes are the expected defaults for the documented image; see the troubleshooting section if yours differs.
| Radio | Control | Pi (per project) | Audio | Expected device | Support tier |
|---|---|---|---|---|---|
| Icom IC-7300 | CI-V over USB | 3B+/4B | Built-in USB | /dev/ttyUSB0 | Tested in this guide |
| Icom IC-7610 | CI-V over USB | 3B+/4B/5 | Built-in USB | /dev/ttyUSB0 | Project-tested |
| Icom IC-705 | CI-V over USB | 4B only | Built-in USB | /dev/ttyACM0 | Project-tested |
| Icom IC-756 | CI-V (serial) | 3B+/4B | USB audio + interface | /dev/ttyUSB0 | Documented |
| Yaesu FT-450 | CAT (serial) | 3B+/4B | USB audio + interface | /dev/ttyUSB0 | Documented |
| Yaesu FT-950 | CAT (serial) | 3B+/4B | USB audio + interface | /dev/ttyUSB0 | Documented |
| Yaesu FT-2000 | CAT (serial) | 3B+/4B | USB audio + interface | /dev/ttyUSB0 | Project-tested |
| Yaesu FT-710 | CAT | 2B/3B/3B+ | USB audio + interface | /dev/ttyUSB1 | Project-tested |
For the tested IC-7300 on a Pi 4, the shopping list is short:
- Raspberry Pi 4 Model B and a 3A power supply
- microSD card, 8GB or larger, class 10
- USB Type-A to Type-B cable (the IC-7300 carries CAT and audio over that one cable)
- Ethernet cable, Cat5e or newer, to your router (wired is more reliable than WiFi for live audio)
- A ham radio callsign, admin access to your router, and an internet connection
Radios without built-in USB (the IC-756 and the listed Yaesu models) also need a USB audio adapter, an audio interface, and a USB serial adapter, as detailed in the installation guide. This guide uses wired Ethernet; WiFi configuration is out of scope and is covered in the SimpleHRR user manual.
Download and Flash the SimpleHRR Image
Download the current image from the SimpleHRR download page (v0.2.1-T-a at the time of testing) and unzip it. Write the .img to your microSD card with Raspberry Pi Imager or balenaEtcher. In Imager, choose “Use custom,” select the unzipped SimpleHRR image rather than a stock OS, and do not apply the usual OS customisation, since the image is already configured.
Flashing erases everything on the target card. Confirm you have selected the microSD card and not another drive before you write. When the write and verify finish, you have a ready-to-run SimpleHRR card. Eject it and set it aside until the radio is configured.
Configure the Icom IC-7300 for CI-V
SimpleHRR talks to the radio over CI-V, so the IC-7300 has to accept that control. Confirm the radio is on firmware 1.2 or later, then set the following, which come from the SimpleHRR installation guide. Other Icom models use the same pattern with a different CI-V address (the IC-7610 uses 98h, the IC-705 uses A4h).
Under Menu > Set > Connectors:
- ACC/USB Output Select: AF, Output Level: 50%
- USB MOD Level: 50%, DATA OFF MOD: USB
- USB Serial Function: CI-V
- USB SEND, USB Keying (CW), and USB Keying (RTTY): all OFF
- CI-V Baud Rate: Auto, CI-V Address: 94h, CI-V Transceive: ON
- CI-V Output (for ANT): OFF
- CI-V USB Port: Unlink from [REMOTE]
- CI-V USB Baud Rate: Auto, CI-V USB Echo Back: ON
Then under Menu > Set > Function, set Time-Out Timer (CI-V) to 3 minutes. Icom occasionally relabels menu items between firmware versions, so if a label does not match exactly, look for the nearest equivalent. With these saved, the IC-7300 answers CI-V over the USB cable and cuts a transmission that runs past three minutes.
umented radios instead. In other words, the radio side is straightforward; whether SimpleHRR will talk to it is the open question.
Connect the Radio and Start the Raspberry Pi
Plug the USB Type-A to Type-B cable from the Pi into the IC-7300, run the Ethernet cable from the Pi to your router or switch, and insert the flashed microSD card. The power order matters: radio on first, then the Pi. On a first install the boot takes about two minutes while SimpleHRR installs its prerequisites, per the installation guide; the green activity LED settling is your cue. After that boot the Pi is running the SimpleHRR web server and waiting to be activated. Keep the radio-first order on every future reboot, or the app will not find the rig.
Find the Pi on Your Network
Log into your router and look through the attached devices for the hostname simplehrr. Note its IP address (something like 192.168.1.x). To keep that address from changing, set a DHCP reservation for it as covered in the Raspberry Pi static IP guide.
Activate SimpleHRR
In Chrome or Firefox, go to:
https://your-pi-ip:50000/remoteYour browser will warn about the certificate, because the app serves its own. Accept it to continue on your local network. On the activation screen, enter your callsign as the username and a password of more than eight characters (the email can stay at the default). Select your radio and the USB device. For the IC-7300 that is /dev/ttyUSB0. Expected defaults for other models are /dev/ttyUSB0 for the IC-7610 and IC-756, /dev/ttyACM0 for the IC-705, and /dev/ttyUSB1 for the FT-710. Click Activate, confirm, and wait about a minute while the Pi reboots.
When it comes back, sign in with your callsign (In my experience, it had to be lower-case regardless of how it was setup) and password and click Call Radio. The first time it takes a few seconds to turn green. If you see “Unable to Connect to Radio,” the rig is off, on a different USB device than the one you selected, or not in CI-V mode.
Verify Radio Control and Audio
Before you rely on the station, confirm the whole path works. Run down this checklist once Call Radio is green:
- You can sign in with your callsign and password.
- Call Radio turns green and stays connected.
- Changing frequency and band in the browser moves the dial on the rig.
- Receive audio is audible in the browser.
- PTT keys the radio (watch the rig’s transmit indicator, since there is no VOX feedback).
- Holding transmit past three minutes triggers the radio’s time-out timer.
- Hang Up releases the radio cleanly.
If every item passes, the station is ready. Any failure points you at the matching entry in troubleshooting below.
Configure Secure Remote Access
By default SimpleHRR is reachable only on your local network. The project documents port forwarding for internet access, but opening a port straight to a device that keys a transmitter is worth avoiding. The safer approach, and the one this site recommends for any remote Pi service, is to put the Pi and your remote device on a private encrypted network with Tailscale, then reach https://pi-tailscale-ip:50000/remote with no ports open to the world. The full walkthrough is in the Tailscale on Raspberry Pi guide. A traditional VPN back to your home router works the same way.
Safety and Control-Operator Requirements
- You are the control operator. In the United States, amateur stations may be remotely controlled when operated in accordance with applicable FCC rules and your license conditions. Rules and privileges vary by country, so review the requirements for your jurisdiction before operating off-site.
- No VOX. There is no transmit-state feedback over the link, so a stuck VOX could hold the radio in transmit without your knowing. Use the app’s push-to-talk and the radio’s time-out timer.
- Power sequence. Radio on first, then the Pi, every time.
- Green LED on a Pi 3B. The project notes a known quirk where the green LED keeps flashing on a Pi 3B with the Trixie image, with a fix in their user manual. It does not affect the 4B.
Troubleshooting SimpleHRR
“Unable to Connect to Radio.” The radio is off, set to the wrong USB device, or not configured for CI-V. Confirm the rig is powered on, that CI-V Transceive and USB Echo Back are ON, and that you picked the right device node.
Finding the correct USB device. The /dev/ttyUSB0, /dev/ttyACM0, and /dev/ttyUSB1 values are expected defaults, but Linux device numbering can shift with what else is plugged in. After activation you can sign into the Pi over SSH with your callsign and password (using the SSH steps here) and identify the real node:
ls -l /dev/serial/by-id/
dmesg | grep -i tty
The by-id listing shows a stable name for each USB serial adapter and the ttyUSB or ttyACM node it maps to. Re-run activation and select that node.
The web page will not load. Check the full address: https, the :50000 port, and the /remote path. On a fresh install, give the Pi a full two minutes to finish first-boot setup. Confirm the IP against your router and that you are on the same network as the Pi.
No receive or transmit audio. Recheck the radio’s AF output and USB MOD levels (50% is the starting point) and DATA OFF MOD set to USB. On radios that use an external audio interface, confirm the mic and speaker connections through the interface.
Activation failed or lost credentials. The simplest recovery is to reflash the image to the card and activate again, which resets the app to a clean state. The SimpleHRR user manual, reachable with your callsign and password the day after setup, covers maintenance access and log locations for deeper diagnosis.
Updating and Backing Up
SimpleHRR is distributed as a full image, so updating means downloading the latest release from simplehrr.com and reflashing a card. Before you replace a working card, image it first so you can roll back, as covered in the Raspberry Pi backup guide, and note any logbook data you want to keep.
FAQ
Is SimpleHRR free?
Yes. The SimpleHRR web app and the Raspberry Pi image are free to download and use, with no subscription. You supply the Raspberry Pi, the microSD card, and any interface hardware your radio needs.
Which radios does SimpleHRR support?
It provides documented settings for the Icom IC-7300, IC-7610, IC-705, and IC-756 and the Yaesu FT-450, FT-950, FT-2000, and FT-710, several of which the project reports testing (see the compatibility table). Because it uses generic CI-V and CAT commands, it may also work with other Icom and Yaesu radios that speak those protocols, though those are not documented.
Does SimpleHRR work with the Yaesu FT-991A?
The FT-991A is not on SimpleHRR’s documented list, so it is not officially supported. It may work through SimpleHRR’s generic CAT handling, and on the hardware side it is convenient because CAT and audio both run over its single built-in USB port. But the activation screen only lists documented radios, so before counting on it, ask the SimpleHRR author whether the current image includes the FT-991A. The article’s FT-991A section covers preparing the radio itself.
Which Raspberry Pi do I need for SimpleHRR?
The project lists testing on the Pi 2B, 3B, 3B+, 4B, and 5. A 3B+ or 4B is a good general choice. Two exceptions from the documentation: the IC-705 requires a Pi 4B, and the FT-710 is listed for the Pi 2B, 3B, and 3B+. Use a 3A power supply and wired Ethernet for the most reliable results.
Can I use SimpleHRR over the internet?
Yes, but do it safely. The default install is local-network only. Rather than forwarding a port to a device that can key your transmitter, connect the Pi and your remote device with Tailscale or a VPN and reach the app over that private network. Whatever method you use, follow the rules for remote operation in your jurisdiction.
Do I need to install anything on my phone or laptop?
No. SimpleHRR is a web app, so a current Chrome or Firefox browser is all you need on the client. Everything runs on the Raspberry Pi, and you point the browser at the Pi’s address.
Sources and Test Notes
This walkthrough was carried out on a Raspberry Pi 4 Model B with an Icom IC-7300 on SimpleHRR v0.2.1-T-a. Settings, device nodes, per-model requirements, and version notes are drawn from the SimpleHRR documentation below; the IC-7300 procedure was verified on the tested hardware, and other models are marked in the compatibility table as project-tested or documented.
- SimpleHRR installation guide (settings, device nodes, Pi models, release notes): simplehrr.com/simple-ham-radio-remote-installation-guide
- SimpleHRR Raspberry Pi project page: simplehrr.com/simple-ham-radio-remote-project-rpi-remote
- Raspberry Pi Imager: raspberrypi.com/software
- FCC amateur radio service (US control-operator rules): fcc.gov amateur radio service
- Related build: Radioberry HAT SDR transceiver guide
About the Author
Chuck Wilson has been programming and building with computers since the Tandy 1000 era. His professional background includes CAD drafting, manufacturing line programming, and custom computer design. He runs PidiyLab in retirement, documenting Raspberry Pi and homelab projects that he actually deploys and maintains on real hardware. Every article on this site reflects hands-on testing on specific hardware and OS versions, not theoretical walkthroughs.
Tested on the hardware and image noted at the top of this article. July 2026.